Chapter Four: Images and links
In this chapter we will discuss two elements called images and anchor. These elements require attributes that need to be defined for them to work properly. Adding more attributes into these elements also can manipulate how they will look.
Links
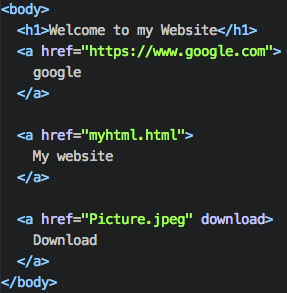
The element tag for adding a link is called anchor. This element is used to link one html file to the next html file. It can also be used to link to another website as well.
href attribute
The href attribute specifics the URL link that you want to connect to when the user clicks on the link. This is a must need attribute because there needs to be a target for the user to go to when they have clicked on the link.
Linking to your html file
If you plan to link to another html file that you have already made. You simply write the name of that html file(<a href="HelloWorld.html"> Link </a>). The html file has to be in the same folder as the anchor html file or else it won't know the directory.
Download attribute
The download attribute is used if you want the directory to be downloaded to the user (<a> href="HelloWorld.jpeg" download </a>). The link will become a download link, so when the user clicks on the link. They will download a image called HelloWorld.jpeg.
Images
The element tag for adding an image on to your web page is called img. This element will take a image from a directory and display the image.
src attribute
The src attribute specific the URL directory of where the file is located. Similar to the anchor element the file has to be in the same folder in the HTML file.
alt attribute
The alternate attribute is a useful attribute to replace a broken src attribute with a text. Src attribute can be broken if the file cannot be found.
Width and Height attribute
These attributes change the height and width of the image. The numbers are scaled by pixels.
